AWS Deployment Azure Deployment
Summary
SharePoint 2010 collaboration software provides enterprise-scale capabilities to meet business-critical needs such as managing content and business processes, simplifying how people find and share information across boundaries, and enabling informed decisions.
SharePoint 2010 save time and effort by using the Connect to Office function . The Connect to Office function lets Microsoft Office applications know which SharePoint libraries you frequently use. When you connect a library to Office, the library is available in the Office Back Stage for opening and saving files. When you want to create a new Office document, you can view the list of templates in connected libraries as well as local and online templates.
SharePoint Access sites and content from mobile devices using a modern micro-browser and an access gateway. It uses more than 40 out-of-the-box Web Parts to add functionality anywhere in a site with point-and-click simplicity.
CloudMint Provides Enterprise Ready images of SharePoint on the cloud ( AWS marketplace, Azure and Google Cloud Platform).
Deploy SharePoint securely on cloud i.e. AWS marketplace, Azure and Google Cloud Platform (GCP)
Highlights
Major Features of SharePoint 2010 Standard
Microsoft SharePoint Standard builds on the Microsoft SharePoint Foundation in a few key product areas.
- Accessibility: Use SharePoint more effectively with improved accessibility, including built-in support for keyboard navigation and support for industry-wide accessibility standards.
- Claims-Based Authentication: Use claims-based authentication to connect to corporate identity systems–including Active Directory, LDAPv3-based directories, and application-specific databases–and user-centric identity models–like LiveID, OpenID, and InfoCard systems.
- Mobile Connectivity: Access sites and content from mobile devices using a modern micro-browser and an access gateway.
- SharePoint Workspace: Take lists, libraries, line-of-business data, and entire sites offline with SharePoint Workspace 2010. Work locally and SharePoint Workspace 2010 will synchronize any offline changes with the server when connected.
- Windows PowerShell Support: Achieve greater control and productivity with Windows PowerShell, a command line shell and scripting language. SharePoint 2010 offers a snap-in so you can take advantage of PowerShell for your SharePoint deployments and manage your server farm and automate tasks with out-of-the-box cmdlets.
SharePoint Standard licensing includes a CAL (client access license) component and a server fee. SharePoint Standard may also be licensed through a cloud model.
AWS
Installation Instructions For Windows
Installation Instructions for Windows
Step 1) RDP Connection: To connect to the deployed instance, Please follow Instructions to Connect to Windows instance on AWS Cloud
1) Connect to virtual machine using following RDP credentials :
- Hostname: PublicDNS / IP of machine
- Port : 3389
Username: To connect to the operating system, use RDP and the username is Administrator.
Password : Please Click here to know how to get password .
Step 2) Application Access Instructions:-
Note : Users need to reach out to us for CAL license providing number of CAL required.
If you face any issue in running this image or activating license, Please reach out to support@cloudmint.us.
- SharePoint Server has already been installed.
- SharePoint configuration should be completed by the user.
- Please join a domain and have a SQL Server instance ready before starting the SharePoint Configuration.
1. Default Login Credentials for SharePoint Access are same as your RDP Credentials,
- User Name: Administrator
- Password: Retrieved from Console
Step 3) Other Information:
1.Default installation path: will be in your root folder “C:\Program Files\Common Files\microsoft shared\Web Server Extensions\14\BIN”
2.Default ports:
- Windows Machines: RDP Port – 3389
- Http: 80
- Https: 443
Configure custom inbound and outbound rules using this link
Note: World Wide Web and IIS Admin services must be enabled (from services.msc) in order to access SharePoint 2010 Standard
Installation Step by Step Screenshots
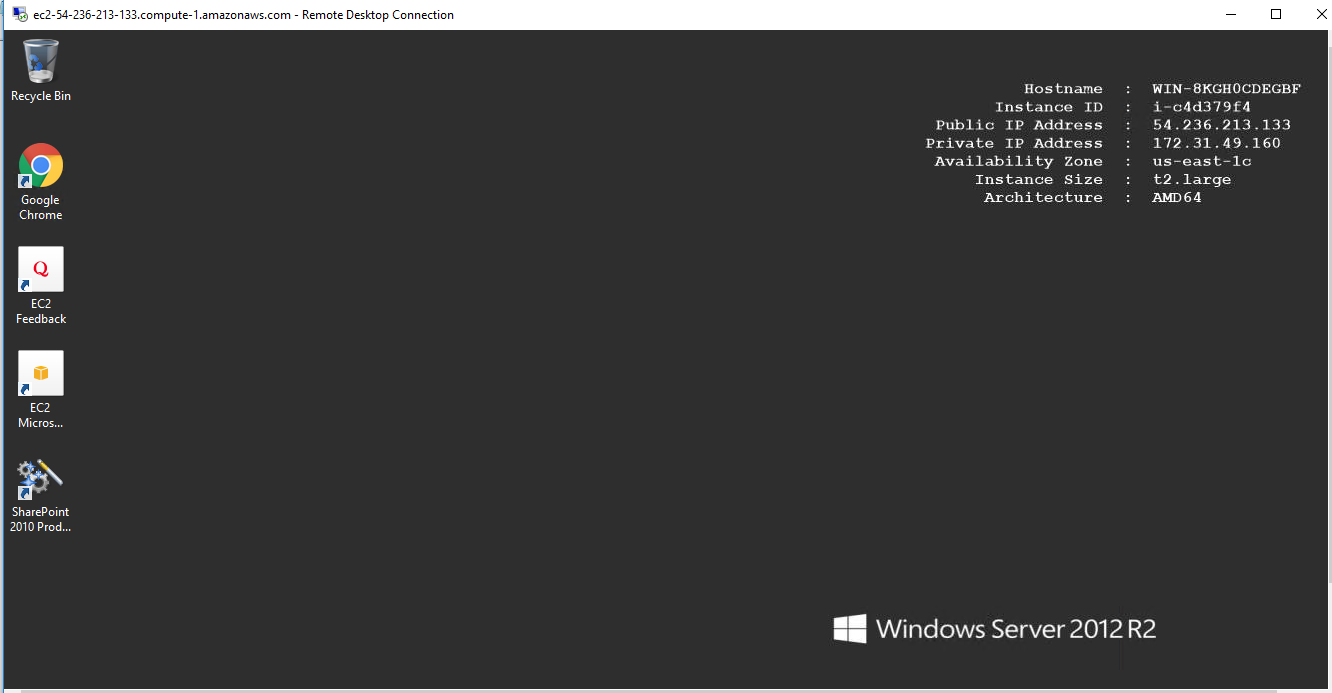
Step 1. Open SharePoint 2010 Application using desktop icon
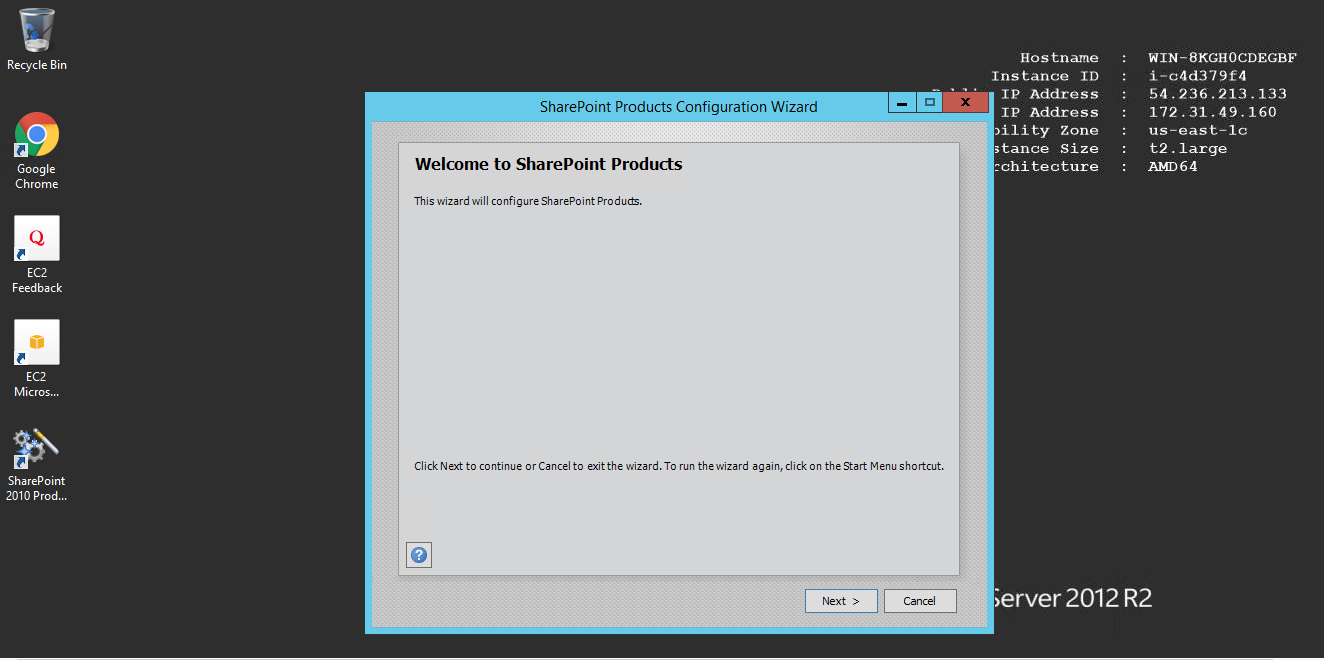
Step 2.Welcome Page SharePoint
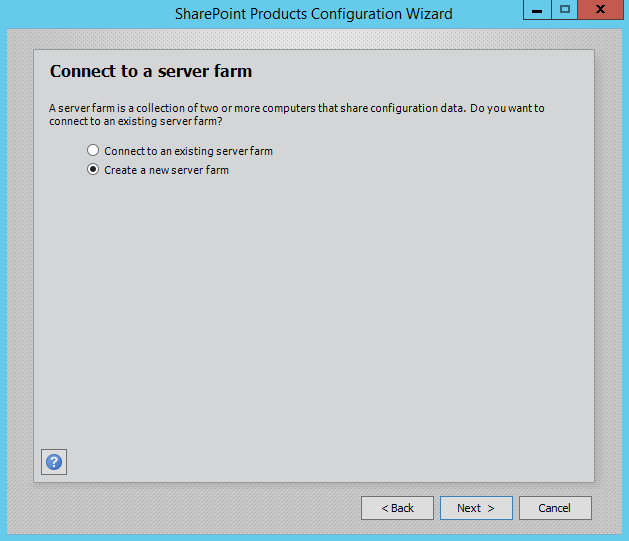
Step 3.Select Create a new server farm option from the next step as shown in below screen, if you are already have installed a new farm and doing a MinRole installation then select the first option to connect to an existing server farm.
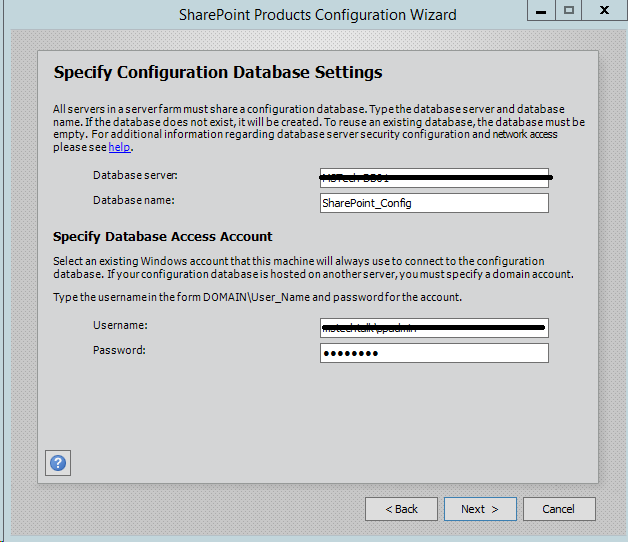
Step 4.Enter the database server details and database access account details, use a separate user for this but I am using the same SPAdmin user for the preview installation. I have assigned it below rights in DB server:
- Dbcreator
- SecurityAdmin
- SysAdmin
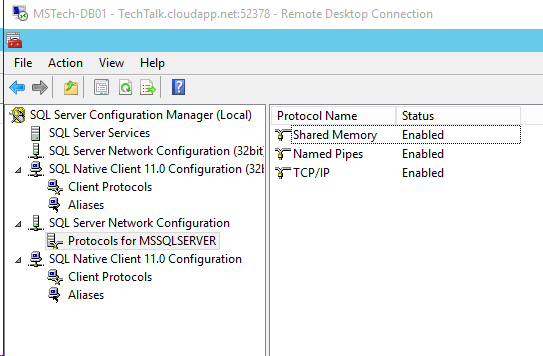
Step 5.If you are facing issues in connecting to SQL Server then make sure TCP/IP is enabled in SQL Server Configuration Manager. If you still getting the error then turn off the firewall on SQL server machine.
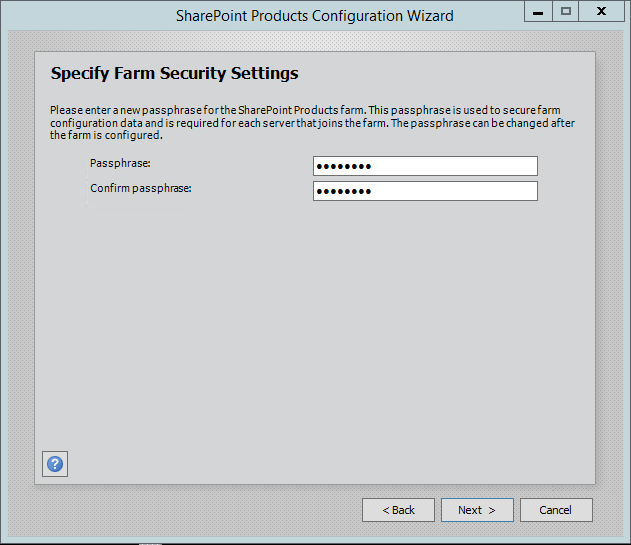
Step 6. After completing the database settings, press next which will take to you on Farm security settings page. Enter passphrase here which is required to secure the farm configuration data and is required for each server that joins the farm.
Step 7. Server Roles or the MinRoletopology
Here comes the MinRoles, SharePoint Server 2010 has six types of server roles:
- Front-end
- Application
- Distributed Cache
- Search
- Custom
- Single-Server Farm
You can either select single-server farm or can do a multi-server installation using MinRolestopology. If you have selected Single-Server Farm then you cannot extend to Multi-Server environment, so if you plan to extend to multi-Server farm in future then select the Custom MinRole or Application.
I am using single-server farm installation so will go with the last option.
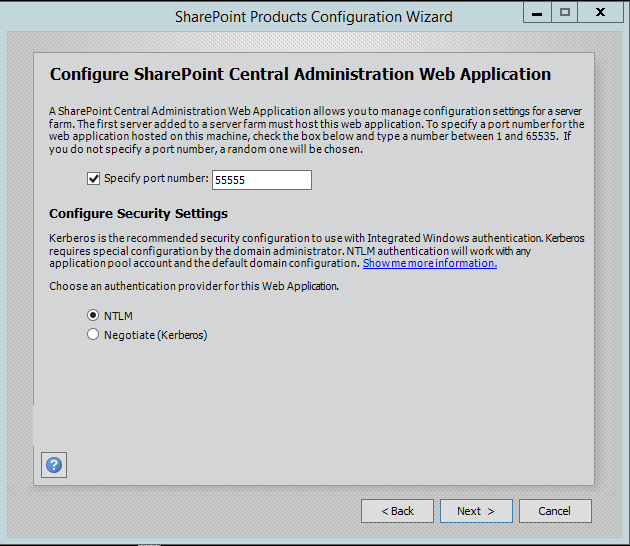
Step 8.On next screen, you can specify port for Central Admin or can use the default which is selected randomly. I have never used the default port, I always an easy one which I can remember like 5555. Select NTLM installation mode at this phase and press next.
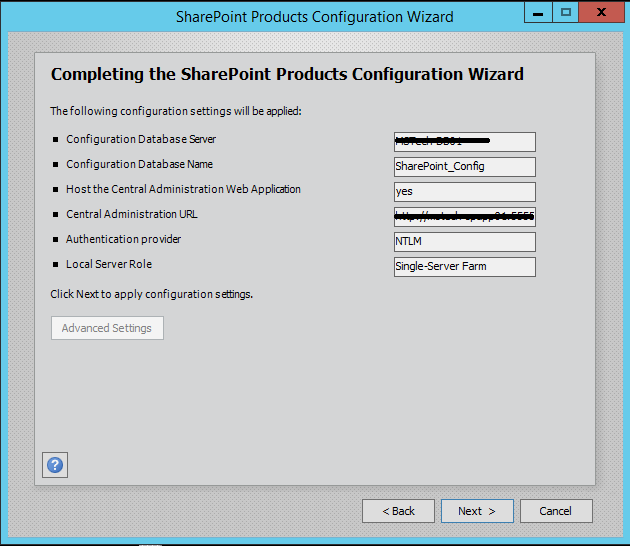
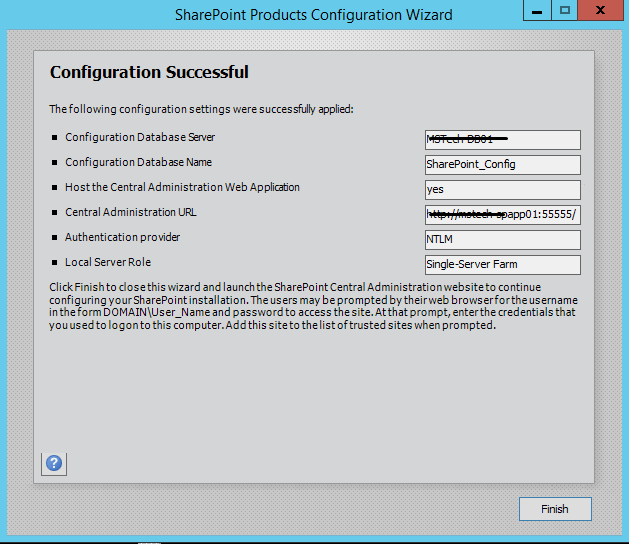
Step 9. Verify the settings in configuration wizard, press next to start the wizard. Advance option is not enabled for Single-Server installation.
Step 10. Press Next button, it will start the configuration of SharePoint farm. This is similar to what we do in past with MOSS 2007, SharePoint 2010 and SharePoint 2013 or even with SharePoint Foundation which is no more part of SharePoint 2016.
Step 11. The wizard can take some time and if you get some errors then you have to verify the roles of the user in SQL Server.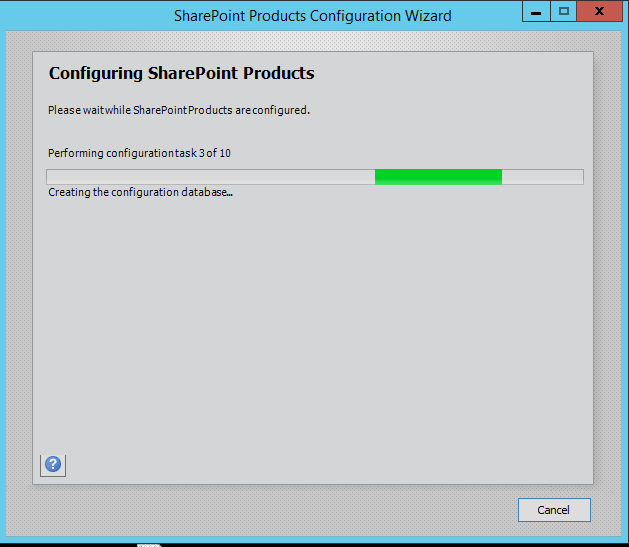
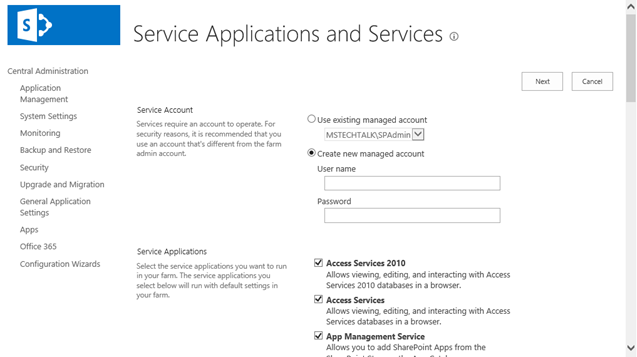
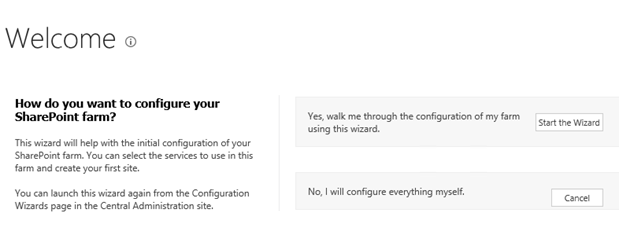
Step 12. After the installation, run the services wizard from Central Administration, setup will take you to the service configuration wizard page, you can either configure them through wizard and can also configure them manually.
Step 13.As this is test environment, so I will prefer configuring services using wizard. We can define a separate account for services but I am using the same SharePoint Admin account for all services.
Step 14.This will complete the services wizard for me and now I am ready to explore SharePoint.

Videos
SharePoint 2010

