AWS Deployment Azure Deployment
Summary
SharePoint 2010 reduce administrative expenses by allowing SharePoint 2010 to take control of your accounts. SharePoint 2010 can automatically reset passwords based on domain policies and notify administrators when passwords are expiring. By storing account information in SharePoint 2010, you can keep your information secure and reduce the overhead required to manage it yourself.
Minimize downtime during patching and upgrade operations and support a larger array of high-availability solutions with improved read-only database support. SharePoint 2010 adapts to a read-only state by limiting the write-based actions of the user in a clean and effective presentation.
Microsoft SharePoint 2010 Enterprise improve your insight into server usage and performance with the new unified logging database in SharePoint 2010. Log the usage and health data for your SharePoint farm. Write your own reports or use the provided reports, and log events and tracing data through a new logging Object Model in the database.
CloudMint Provides Enterprise Ready images of SharePoint on the cloud ( AWS marketplace, Azure and Google Cloud Platform).
Deploy SharePoint securely on cloud i.e. AWS marketplace, Azure and Google Cloud Platform (GCP)
Highlights
Major Features of SharePoint 2010 Enterprise
- Access Services – Access Services allows you to easily publish Microsoft Access 2010 databases to your existing SharePoint site. Now you have a site that hosts all of your Access databases and stores all database objects in a list within that site.
- Excel Services – Using Excel Services allows you to create and publish Excel workbooks directly from the browser. You can also create interactive reports and dashboards that can be displayed directly from your browser, using SharePoint. Not only can you view Excel workbooks in the browser, but you can also create and modify them with no need for the client to be installed on your workstation.
- Performance Point Services – PerformancePoint Services is BI’s best friend. This lets you utilize KPI’s to create reports and dashboards, allowing you to effectively monitor all aspects of your business. If business analysis is essential to your company, you’ll want to use PerformancePoint Services.
- InfoPath Forms Services – InfoPath Forms is a great tool for creating forms and uploading them to your SharePoint site. For example, are you tired of manually filling out expense reports and faxing them to your Human Resource department? Creating an InfoPath form will allow your employees to simply fill out an expense report directly from your SharePoint site and submit them to HR immediately. In other words, any paper form can easily be converted to an electronic form using InfoPath services.
- Enhanced Search Capabilities – If you are using SharePoint 2010 Enterprise edition, you have the ability to provision FAST Search. FAST Search turns your SharePoint search results into Google-esque (err…Bing-esque) search results. Below are features (provided by Microsoft) that primarily only come with FAST Search:
- Advanced Content Processing
- Advanced Sorting
- Contextual Search
- Deep Refinement
- Extensible Search Platform
- Extreme Scale Search
- Rich Web Indexing
- Similar Results
- Thumbnails and Previews
- Visual Best Bets
AWS
Installation Instructions For Windows
Installation Instructions for Windows
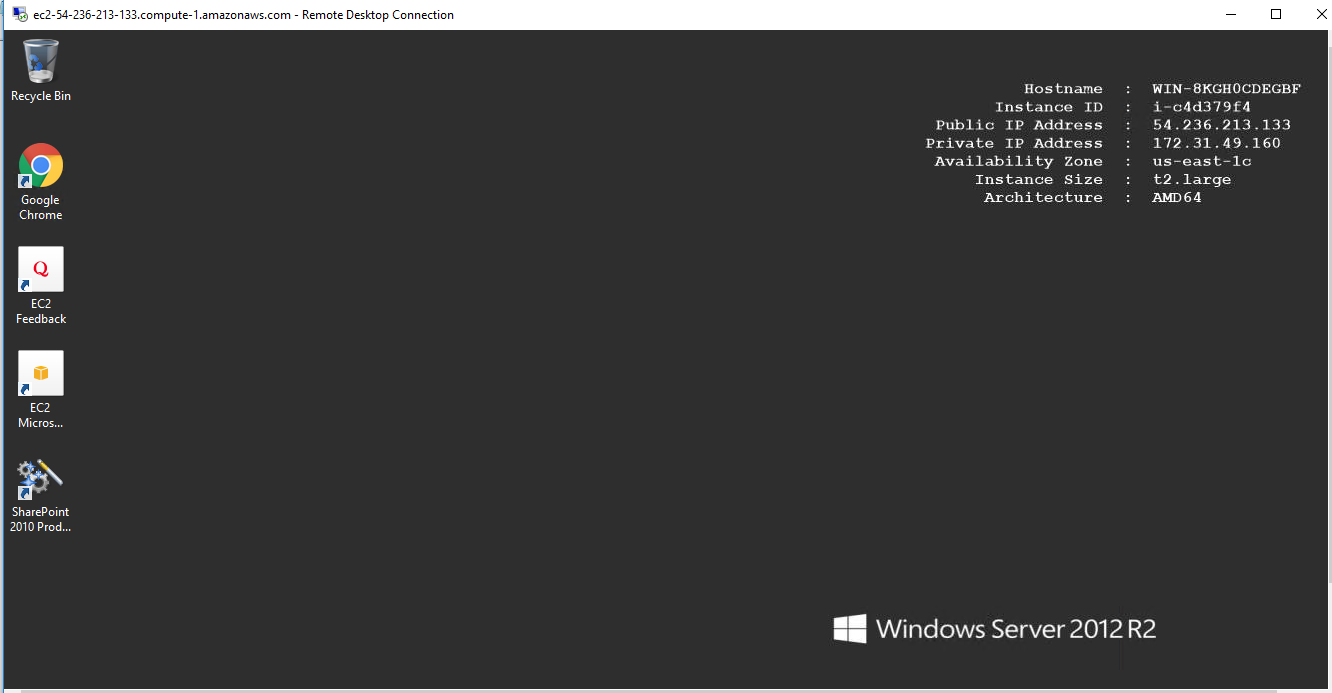
Step 1) RDP Connection: To connect to the deployed instance, Please follow Instructions to Connect to Windows instance on AWS Cloud
1) Connect to virtual machine using following RDP credentials :
- Hostname: PublicDNS / IP of machine
- Port : 3389
Username: To connect to the operating system, use RDP and the username is Administrator.
Password : Please Click here to know how to get password .
Step 2) Application Access Instructions:-
Note : Users need to reach out to us for CAL license providing number of CAL required.
If you face any issue in running this image or activating license, Please reach out to support@cloudmint.us
- SharePoint Server has already been installed.
- SharePoint configuration should be completed by the user.
- Please join a domain and have a SQL Server instance ready before starting the SharePoint Configuration.
1. Default Login Credentials for SharePoint Access are same as your RDP Credentials,
- User Name: Administrator
- Password: Retrieved from Console
Step 3) Other Information:
1.Default installation path: will be in your root folder “C:\Program Files\Common Files\microsoft shared\Web Server Extensions\14\BIN”
2.Default ports:
- Windows Machines: RDP Port – 3389
- Http: 80
- Https: 443
Configure custom inbound and outbound rules using this link
Installation Step by Step Screenshots
Step 1. Open SharePoint 2010 Application using desktop icon
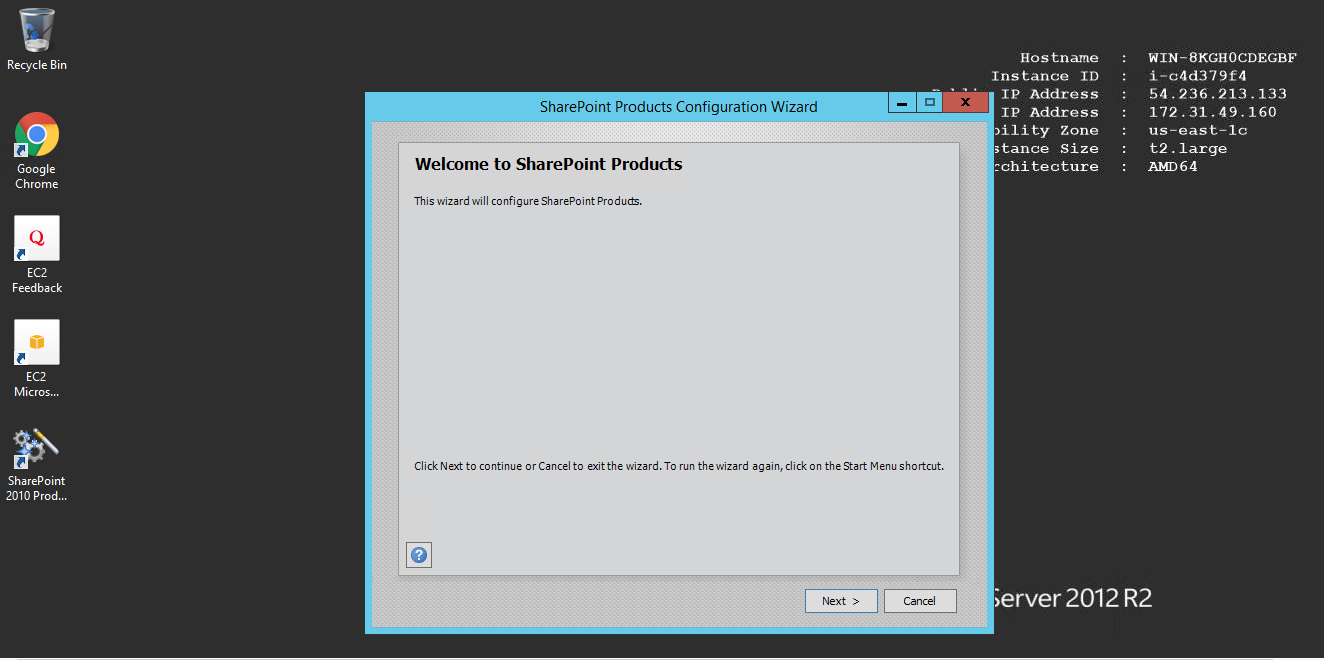
Step 2.Welcome Page SharePoint. Click on Next to Create a new server farm
Step 3. Select Create a new server farm option from the given options, if you are already have installed a new farm and doing a MinRole installation then select the first option to connect an existing server farm.

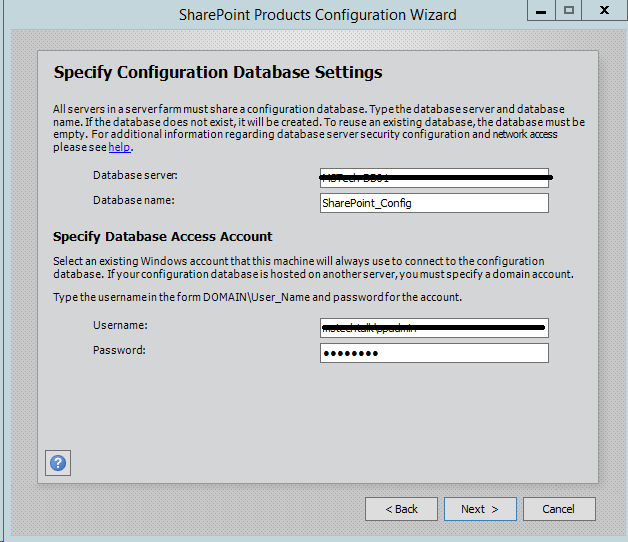
Step 4.Enter the database server details and database access account details, use a separate user for this but we are using the same SPAdmin user for the preview installation. I have assigned it below rights in DB server:
- Dbcreator
- SecurityAdmin
- SysAdmin
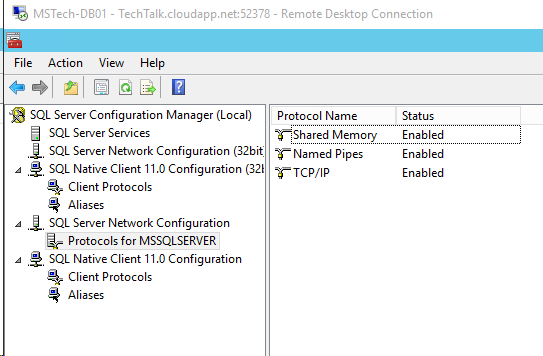
Step 5. If you are facing problem in connecting SQL Server then make sure TCP/IP is enabled in SQL Server Configuration Manager. If you are still getting an error then turn off the firewall in SQL server machine.
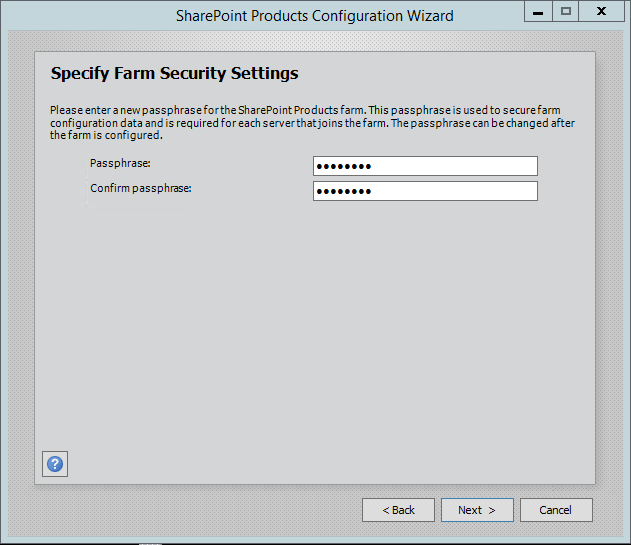
Step 6. After completing the database settings, press next which will take to you on Farm security settings page. Enter passphrase here which is required to secure the farm configuration data and is required for each server that joins the farm.
Step 7. Server Roles or the MinRoletopology
Here comes the MinRoles, SharePoint Server 2010 has six types of server roles:
- Front-end
- Application
- Distributed Cache
- Search
- Custom
- Single-Server Farm
You can either select single-server farm or can do a multi-server installation using MinRoles topology. If you have selected Single-Server Farm then you cannot extend to Multi-Server environment, so if you plan to extend to multi-Server farm in future then select the Custom MinRole or Application.
I am using single-server farm installation so will go with the last option.

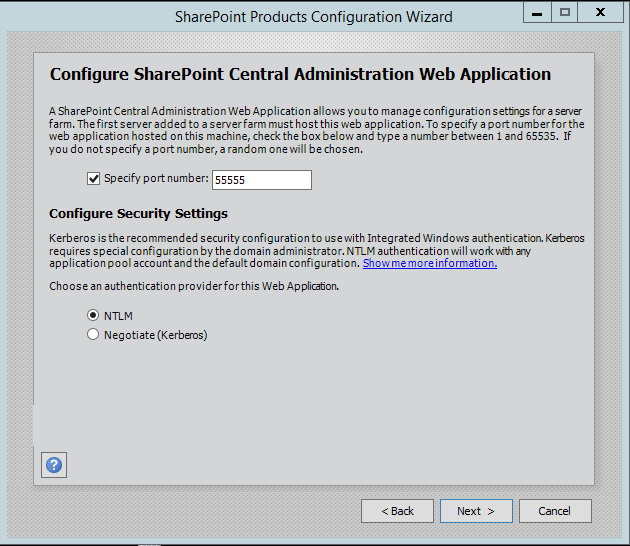
Step 8.On next screen, you can specify port for Central Admin or can use the default which is selected randomly. we have never used the default port, we always use an easy one which I can remember like 5555. Select NTLM installation mode at this phase and press next.
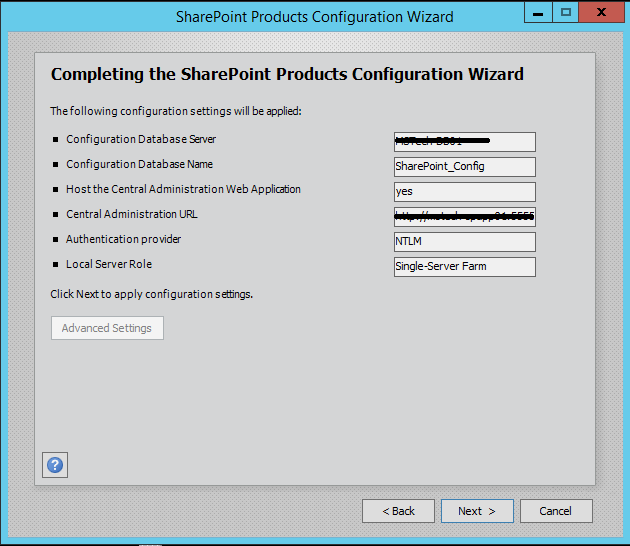
Step 9. Verify the settings in configuration wizard, press next to start the wizard. Advance option is not enabled for Single-Server installation.
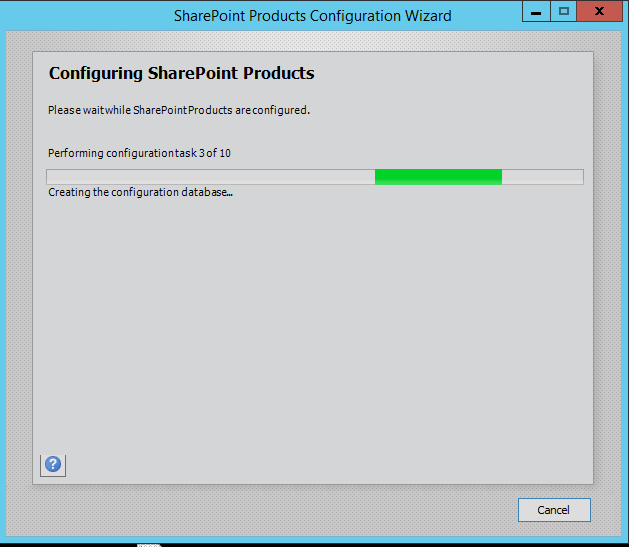
Step 10. Press Next button, it will start the configuration of SharePoint farm. This is similar to what we do in past with MOSS 2007, SharePoint 2010 and SharePoint 2013 or even with SharePoint Foundation which is no more part of SharePoint 2016.
Step 11. The wizard would take some time and if you get some error then you have to verify the roles of the user in SQL Server.
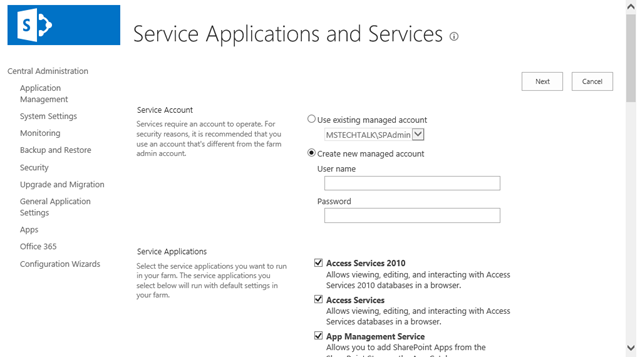
Step 12. After the installation, run the services wizard from Central Administration, setup will take you to the service configuration wizard page, you can either configure them through wizard and can also configure them manually.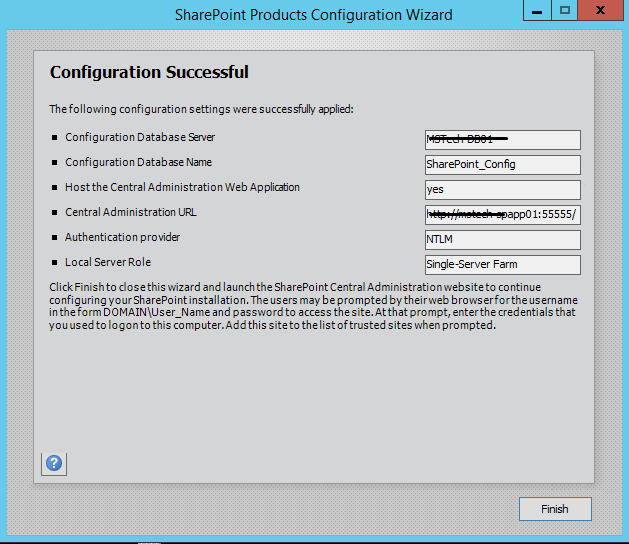
Step 13. As this is test environment, so we will prefer configuring services using wizard. We can define a separate account for services but I am using the same SharePoint Admin account for all services.
Step 14.This will complete the services wizard for us and now we are ready to use SharePoint.


Videos
SharePoint 2010