AWS Deployment Azure Deployment
Summary
MySQL is the most popular Open Source Relational SQL database management system. MySQL is one of the best RDBMS being used for developing web-based software applications.
MySQL is a fast, easy-to-use RDBMS being used for many small and big businesses. MySQL is developed, marketed and supported by MySQL AB, which is a Swedish company. MySQL is becoming so popular because of many good reasons:
- MySQL is released under an open-source license. So you have nothing to pay to use it.
- MySQL is a very powerful program in its own right. It handles a large subset of the functionality of the most expensive and powerful database packages.
- MySQL uses a standard form of the well-known SQL data language.
- MySQL works on many operating systems and with many languages including PHP, PERL, C, C++, JAVA etc.
- MySQL works very quickly and works well even with large data sets.
- MySQL is very friendly to PHP, the most appreciated language for web development.
- MySQL supports large databases, up to 50 million rows or more in a table. The default file size limit for a table is 4GB, but you can increase this (if your operating system can handle it) to a theoretical limit of 8 million terabytes (TB).
- MySQL is customizable. The open-source GPL license allows programmers to modify the MySQL software to fit their own specific environments.
CloudMint provides Enterprise Ready images of MySQL 5.7 on all public cloud ( AWS marketplace, Azure and Google Cloud Platform).
Deploy MySQL 5.7 securely on cloud i.e. AWS marketplace and Azure and Google Cloud Platform (GCP)
Highlights
Major Features of MYSQL on cloud
- Partitioning to improve performance and management of very large database environments
- Row-based/Hybrid Replication for improved replication security
- Event Scheduler to create and schedule jobs that perform various database tasks
- XPath Support
- Dynamic General/Slow Query Log
- Performance/Load Testing Utility (mysqlslap)
- Improved! Full Text Search (faster, new dev templates)
- Improved! Archive engine (better compression, more features)
- Improved! User session and problem SQL identification
- Improved! MySQL embedded library (libmysqld)
- Additional INFORMATION_SCHEMA objects
- Faster data import operations (parallel file load)
- ACID Transactions to build reliable and secure business critical applications
- Stored Procedures to improve developer productivity
- Triggers to enforce complex business rules at the database level
- Views to ensure sensitive information is not compromised
- Information Schema to provide easy access to metadata
- Pluggable Storage Engine Architecture for maximum flexibility
- Archive Storage Engine for historical and audit data
AWS
Installation Instructions For Ubuntu Installation Instructions For RedHat
Installation Instructions For Ubuntu
Note: How to find PublicDNS in AWS
Step 1) SSH Connection: To connect to the deployed instance, Please follow Instructions to Connect to Ubuntu instance on AWS Cloud
1) Download Putty.
2) Connect to the virtual machine using SSH key Refer this link:
- Hostname: PublicDNS / IP of machine
- Port : 22
Step 2) Database Login Details:
Please use MySQL root password TChangeh&33plz7@L for the MySQL configuration.
After your login with SSH you can login to MySQL using
SSH shell> mysql -u root -p
You shall be prompted for password where you can enter the password: TChangeh&33plz7@L
Once you are connected to the MySQL server, a welcome message is displayed and the mysql> prompt appears
Note : Please change password immediately after first login.
You can reset your root password with the following statement:
mysql> ALTER USER ‘root’@’localhost’ IDENTIFIED BY ‘new_password’;
You can come out of mysql Prompt with “exit” command.
Step 3) MySQL Information:
Server version: 5.7.18 MySQL Community Server
MySQL Services:
Using your Unix Login you can perform below actions on MySQL service
- To start MySQL Service: sudo service mysql start
- To stop MySQL Service: sudo service mysql stop
- To restart MySQL Service: sudo service mysql restart
- To get status of MySQL Service: sudo service mysql status
Step 4) Other Information:
1.Default ports:
- MYSQL: 3306
Default ports: MySQL Port: 3306 this is by default not allowed on cloud firewall for security.
Configure custom inbound and outbound rules using this link
2. To access Webmin interface for management please follow this link
Installation Instructions For RedHat
Note: How to find PublicDNS in AWS
Step 1) SSH Connection: To connect to the deployed instance, Please follow Instructions to Connect to RedHat instance on AWS Cloud
1) Download Putty.
2) Connect to the virtual machine using SSH key Refer this link:
- Hostname: PublicDNS / IP of machine
- Port : 22
Step 2) Database Login Details:
Please use MySQL root password TChangeh&33plz7@L for the MySQL configuration.
After your login with SSH you can login to MySQL using
SSH shell> mysql -u root -p
You shall be prompted for password where you can enter the password: TChangeh&33plz7@L
Once you are connected to the MySQL server, a welcome message is displayed and the mysql> prompt appears
Note : Please change password immediately after first login.
You can reset your root password with the following statement:
mysql> ALTER USER ‘root’@’localhost’ IDENTIFIED BY ‘new_password’;
You can come out of mysql Prompt with “exit” command.
Step 3) MySQL Information:
Server version: 5.7.18 MySQL Community Server
MySQL Services:
Using your Unix Login you can perform below actions on MySQL service
- To start MySQL Service: sudo systemctl start mysqld
- To stop MySQL Service: sudo systemctl stop mysqld
- To restart MySQL Service: sudo systemctl restart mysqld
- To get status of MySQL Service: sudo systemctl status mysqld
Step 4) Other Information:
1.Default ports:
- MYSQL: 3306
Default ports: MySQL Port: 3306 this is by default not allowed on cloud firewall for security.
Configure custom inbound and outbound rules using this link
2. To access Webmin interface for management please follow this link
Azure
Installation Instructions For Ubuntu Installation Instructions For CentOS
Installation Instructions For Ubuntu
Note: How to find PublicDNS in Azure
Step 1) SSH Connection: To connect to the deployed instance, Please follow Instructions to Connect to Ubuntu instance on Azure Cloud
1) Download Putty.
2) Connect to the virtual machine using following SSH credentials:
- Hostname: PublicDNS / IP of machine
- Port : 22
Username: Your chosen username when you created the machine ( For example: Azureuser)
Password: Your Chosen Password when you created the machine ( How to reset the password if you do not remember)
Step 2) Database Login Details:
Please use MySQL root password TChangeh&33plz7@L for the MySQL configuration.
After your login with SSH you can login to MySQL using
SSH shell> mysql -u root -p
You shall be prompted for password where you can enter the password: TChangeh&33plz7@L
Once you are connected to the MySQL server, a welcome message is displayed and the mysql> prompt appears
Note : Please change password immediately after first login.
You can reset your root password with the following statement:
mysql> ALTER USER ‘root’@’localhost’ IDENTIFIED BY ‘new_password’;
You can come out of mysql Prompt with “exit” command.
Step 3) MySQL Information:
Server version: 5.7.18 MySQL Community Server
MySQL Services:
Using your Unix Login you can perform below actions on MySQL service
To start MySQL Service: sudo service mysql start
To stop MySQL Service: sudo service mysql stop
To restart MySQL Service: sudo service mysql restart
To get status of MySQL Service: sudo service mysql status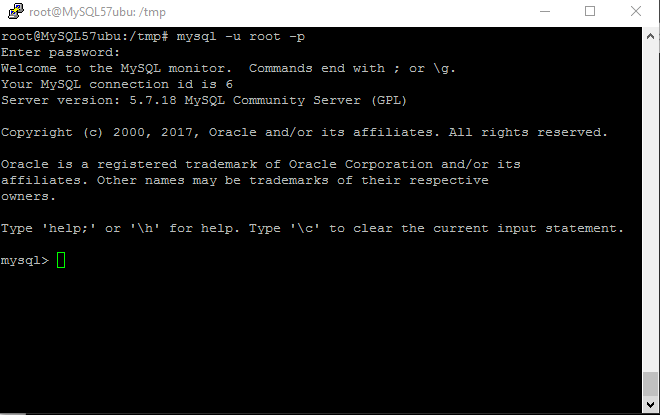
Step 4) Other Information:
1.Default ports:
- MYSQL: 3306
Default ports: MySQL Port : 3306 this is by default not allowed on cloud firewall for security.
Configure custom inbound and outbound rules using this link
2. To access Webmin interface for management please follow this link
Installation Instructions For CentOS
Note : How to find PublicDNS in Azure
Step 1) SSH Connection: To connect to the deployed instance, Please follow Instructions to Connect to CentoOS instance on Azure Cloud
1) Download Putty.
2) Connect to the virtual machine using following SSH credentials:
- Hostname: PublicDNS / IP of machine
- Port : 22
Username: Your chosen username when you created the machine ( For example: Azureuser)
Password: Your Chosen Password when you created the machine ( How to reset the password if you do not remember)
Step 2) Database Login Details:
Please use MySQL root password TChangeh&33plz7@L for the MySQL configuration.
After your login with SSH you can login to MySQL using
SSH shell> mysql -u root -p
You shall be prompted for password where you can enter the password: TChangeh&33plz7@L
Once you are connected to the MySQL server, a welcome message is displayed and the mysql> prompt appears
Note : Please change password immediately after first login.
You can reset your root password with the following statement:
mysql> ALTER USER ‘root’@’localhost’ IDENTIFIED BY ‘new_password’;
You can come out of mysql Prompt with “exit” command.
Step 3) MySQL Information:
Server version: 5.7.18 MySQL Community Server
MySQL Services:
Using your Unix Login you can perform below actions on MySQL service
- To start MySQL Service: sudo systemctl start mysqld
- To stop MySQL Service: sudo systemctl stop mysqld
- To restart MySQL Service: sudo systemctl restart mysqld
- To get status of MySQL Service: sudo systemctl status mysqld

Step 4) Other Information:
1.Default ports:
- MYSQL: 3306
Default ports: MySQL Port : 3306 this is by default not allowed on cloud firewall for security.
Configure custom inbound and outbound rules using this link
2. To access Webmin interface for management please follow this link
Installation Instructions For Windows Installation Instructions For Ubuntu Installation Instructions For RedHat
Installation Instructions For Windows
Step 1) VM Creation:
1.Click the Launch on Compute Engine button to choose the hardware and network settings.
2.You can see at this page, an overview of CloudMint Image as well as some estimated costs of VM.
3.In the settings page, you can choose the number of CPUs and amount of RAM, the disk size and type etc.
Step 2) RDP Connection: To initialize the DB Server connect to the deployed instance, Please follow Instructions to Connect to Windows instance on Google Cloud
Step 3) Database Login Details:
For local MySQL root password, please use the temporary password generated automatically during image creation
i) Please connect to Remote Desktop as given in step 2 to ensure stack is properly configured and DB is initialized.
ii) You can use MySQL server instance as localhost, username root and password
If you have closed the deployment page you can also get the MySQL root password from VM Details “Custom metadata” Section
Installation Instructions For Ubuntu
Step 1) SSH Connection: To connect to the deployed instance, Please follow Instructions to Connect to Ubuntu instance on Google Cloud
1) Download Putty.
2) Connect to the virtual machine using SSH key
-
- Hostname: PublicDNS / IP of machine
- Port : 22
Step 2) Database Login Details:
For local MySQL root password, please use the temporary password generated automatically during image creation
i) Please connect to Remote Desktop as given in step 2 to ensure stack is properly configured and DB is initialized.
ii) You can use MySQL server instance as localhost, username root and password
If you have closed the deployment page you can also get the MySQL root password from VM Details “Custom metadata” Section
Step 3) MySQL Information:
Server version: 5.7.18 MySQL Community Server
MySQL Services:
Using your Unix Login you can perform below actions on MySQL service
- To start MySQL Service: sudo service mysql start
- To stop MySQL Service: sudo service mysql stop
- To restart MySQL Service: sudo service mysql restart
- To get status of MySQL Service: sudo service mysql status
Step 4) Other Information:
1.Default ports:
- Linux Machines: SSH Port – 22
- MYSQL: 3306
2. To access Webmin interface for management please follow this link
Installation Instructions For RedHat
Step 1) VM Creation:
1.Click the Launch on Compute Engine button to choose the hardware and network settings.
2.You can see at this page, an overview of CloudMint Image as well as some estimated costs of VM.
3.In the settings page, you can choose the number of CPUs and amount of RAM, the disk size and type etc.
Step 2) SSH Connection: To connect to the deployed instance, Please follow Instructions to Connect to RedHat instance on Google Cloud
1) Download Putty.
2) Connect to the virtual machine using SSH key
- Hostname: PublicDNS / IP of machine
- Port : 22
Step 3) Database Login Details:
For local MySQL root password, please use the temporary password generated automatically during image creation
i) Please connect to Remote Desktop as given in step 2 to ensure stack is properly configured and DB is initialized.
ii) You can use MySQL server instance as localhost, username root and password .
If you have closed the deployment page you can also get the MySQL root password from VM Details “Custom metadata” Section
Step 4) MySQL Information:
Server version: 5.7.18 MySQL Community Server
MySQL Services:
Using your Unix Login you can perform below actions on MySQL service
- To start MySQL Service: sudo systemctl start mysqld
- To stop MySQL Service: sudo systemctl stop mysqld
- To restart MySQL Service: sudo systemctl restart mysqld
- To get status of MySQL Service: sudo systemctl status mysqld
Step 5) Other Information:
1.Default ports:
- Linux Machines: SSH Port – 22
- MYSQL: 3306
2. To access Webmin interface for management please follow this link
Videos